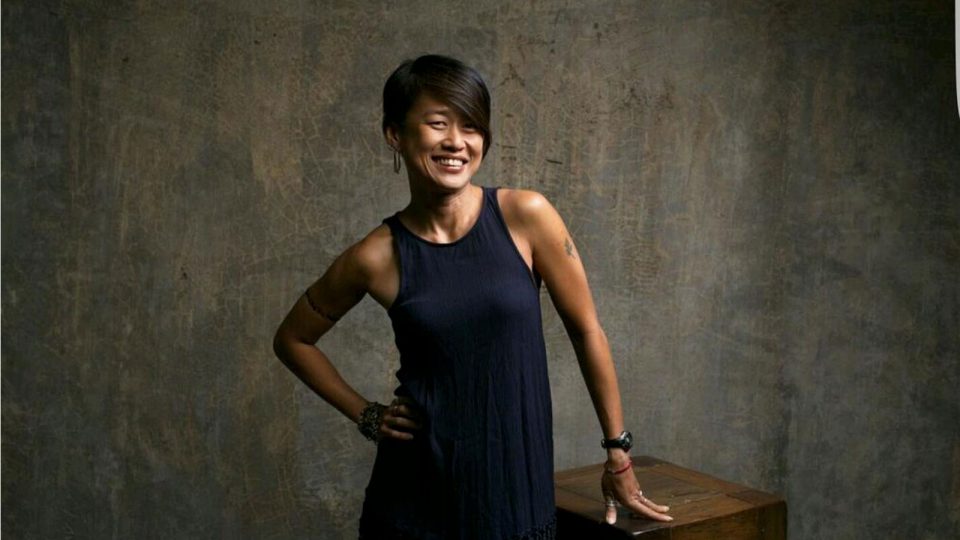
If you currently feel that you know Eileen Lui well enough to consider her a friend-for-life, that’s exactly her intention! The uber-fit communications chick, Burmese boxing aficionado and coach extraordinaire considers herself something of a guru: adopt her methods for staying fit and active and you’ll probably live a very long life in the fast lane, rather than finding yourself a doddering senior with more memories than muscles.
If you’ve been faithfully following Eileen’s directions — despite admitting that you really, really don’t like doing some of the tougher moves — you may find the last of her instructions in this article to be bittersweet.
You’re ready to fly the nest, but you don’t want to say goodbye. You don’t have to. Follow Eileen on Instagram (@eileenlui) and read her daily tips at #fitspiration!
Please mention that you’ve adopted her fitness programme from our publication, and don’t forget to share your progress. Whether it’s a little or a lot, Eileen would love to hear from you!
Week 9: Bend-over Rows
Type of move:
This movement does a fabulous job of strengthening the middle back and the upper back while benefiting your shoulders, biceps and lats. Don’t be surprised if your posture improves, too, since this core-strengthening, lower-body exercise will make you stand up straight — just like your mum always instructed!
How to perform it:
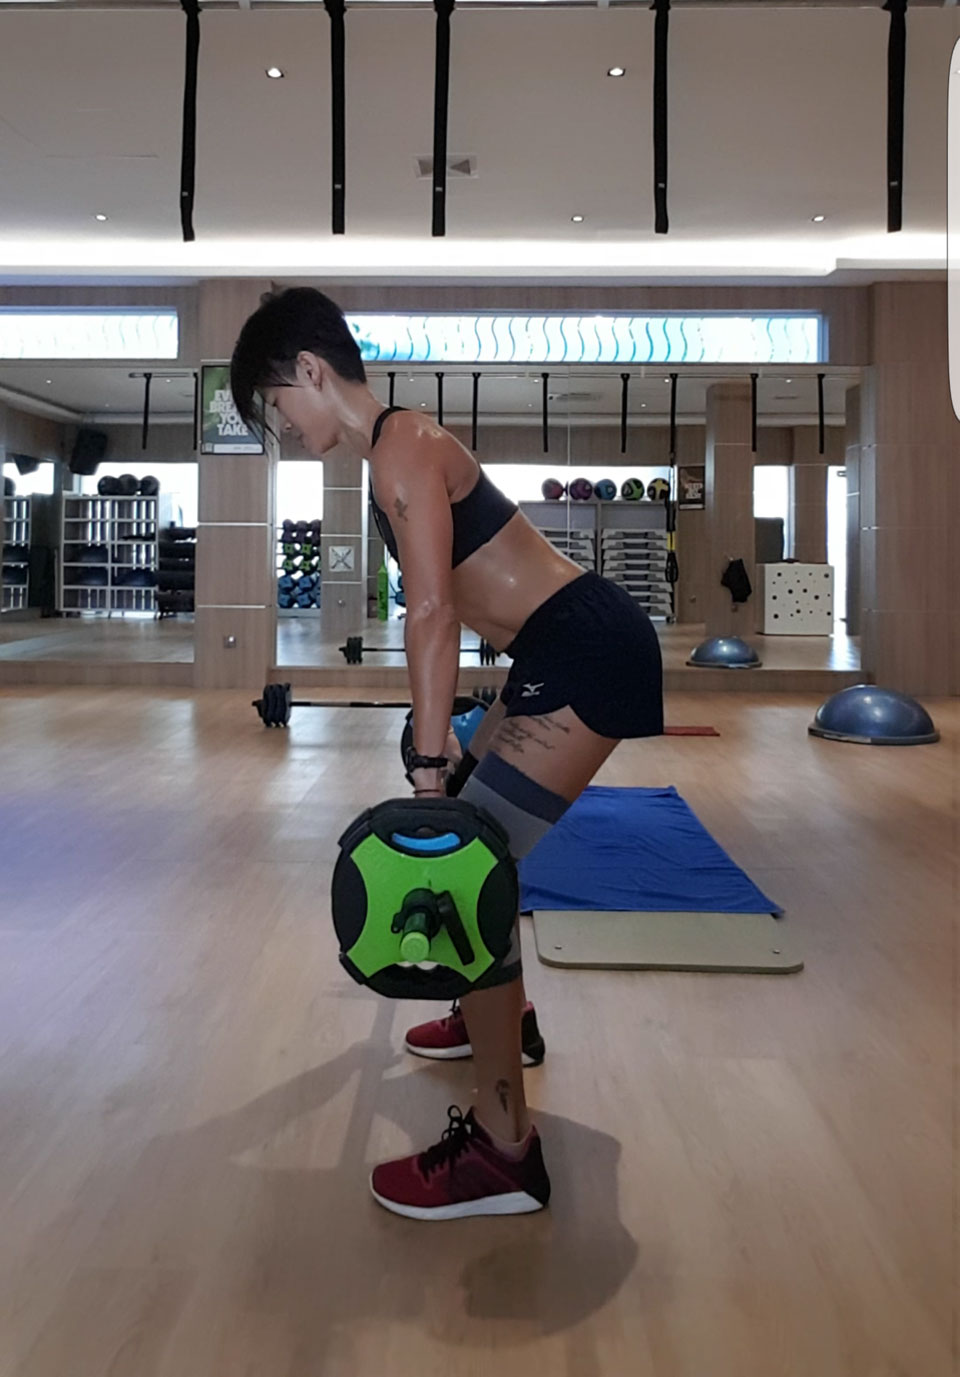
- Begin by standing with your feet shoulder-width apart (yes, you’ve taken this stance a lot!) while keeping your spine neutral and straight. Bend over to pick up the bar
- Raise both your knees and hips as you stand back up. This should be familiar: you mastered it while learning the dead lift movement
- Stop when the bar has been lifted slightly above your knees (see photo #1). Your torso should be at a 45-degree angle in relation to the floor
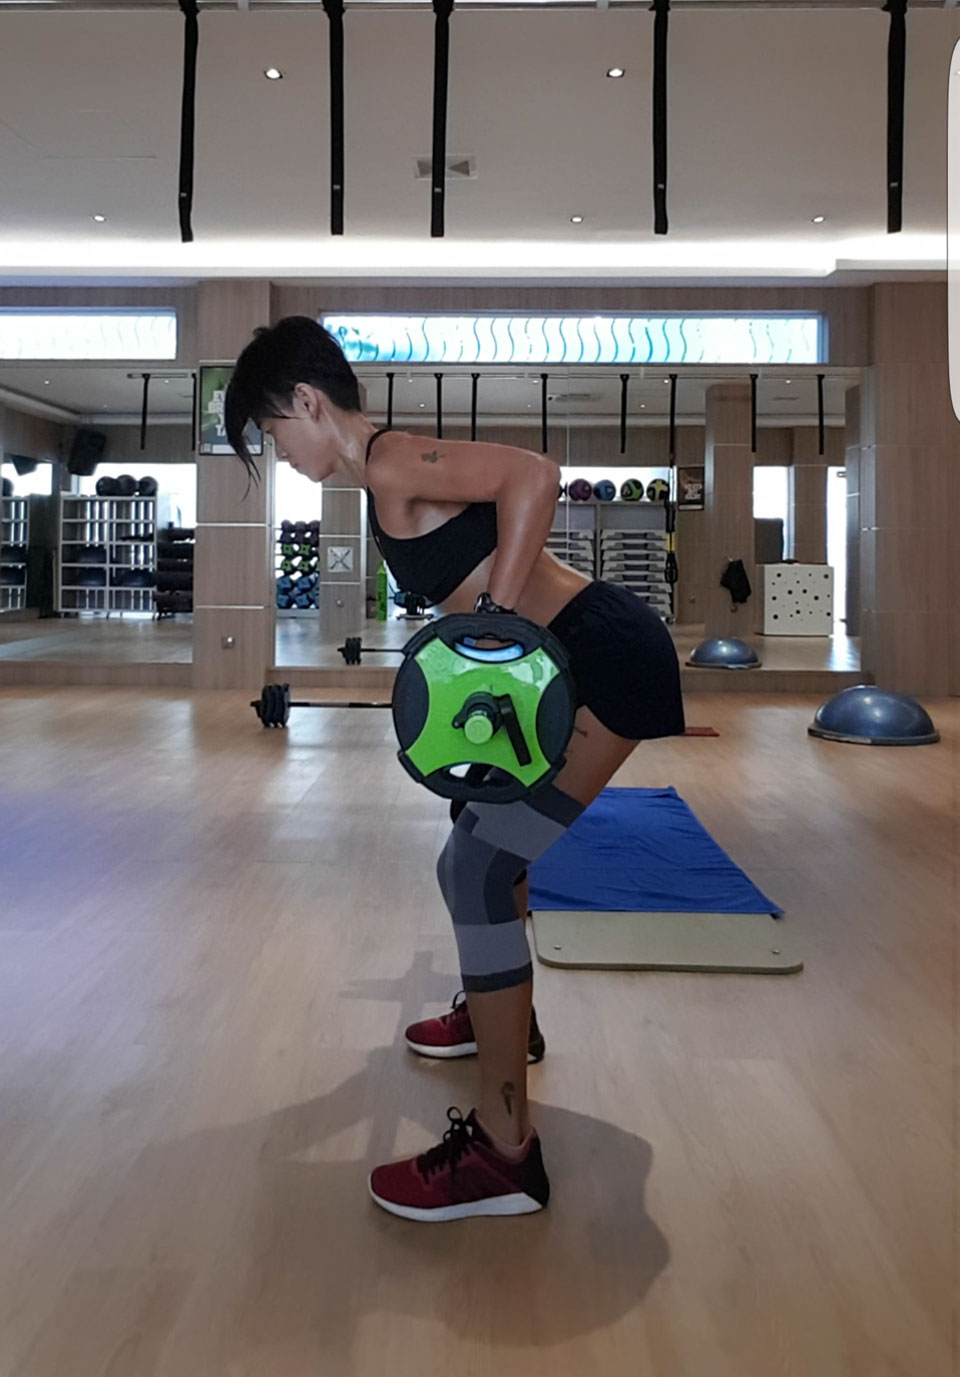
- While squeezing your shoulder blades together, “row” the weight up until it reaches your navel (photo #2)
- As you row the bar back up, check your torso and spine to make sure neither can move up or down
- Return the bar to its start position to complete a full rep
Eileen’s tips: Remember when I mentioned the pronated grip (palms facing downward to achieve better upper back strength)? Time to assume that stance once more to achieve more of a compound movement.
If you make sure your palms are always face downward, you’ll be in good company: my best students swear by this grip and I’ve even been told that sculptors use it to maintain hand strength.
I’m hoping that this move inspires you to learn a more advanced technique called the snatch grip, but be advised, the snatch grip is not for the faint of heart because it requires serious muscle to pull it off properly!
Week 10: Planks
Type of move:
If you think these 10 weeks have flown by, you’re right. But I’ve saved the best for last; the plank belongs at the very heart of any core conditioning programme. Want killer abs? Master the plank and you’ll be rewarded with a stronger body. No equipment required, either!
How to perform it:
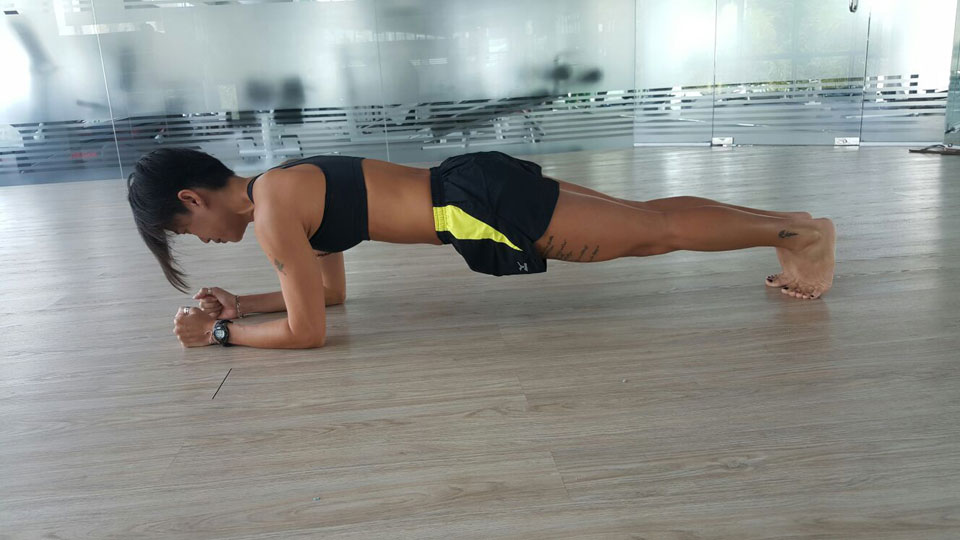
- Assume a basic push-up position on the floor
- Bend your elbows so they’re at a 90-degree angle. Your forearms should bear your body weight
- Check to make sure your elbows are positioned directly under your shoulders (photo #1)
- Maintain a straight, neutral spine that extends from your head to your feet and resist the tendency to sag or pike while holding your position
- Tighten your abs and your buns and hold this core-building position for as long as you can.
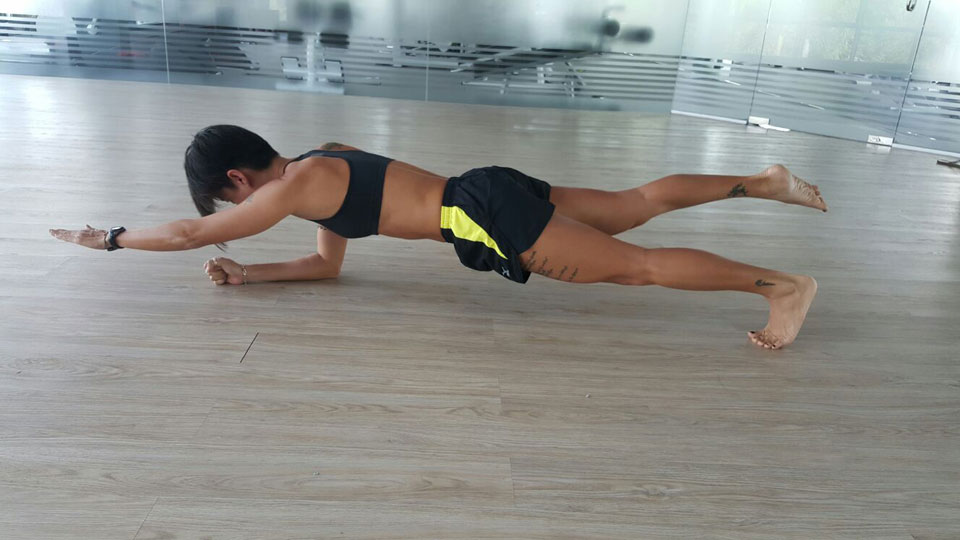
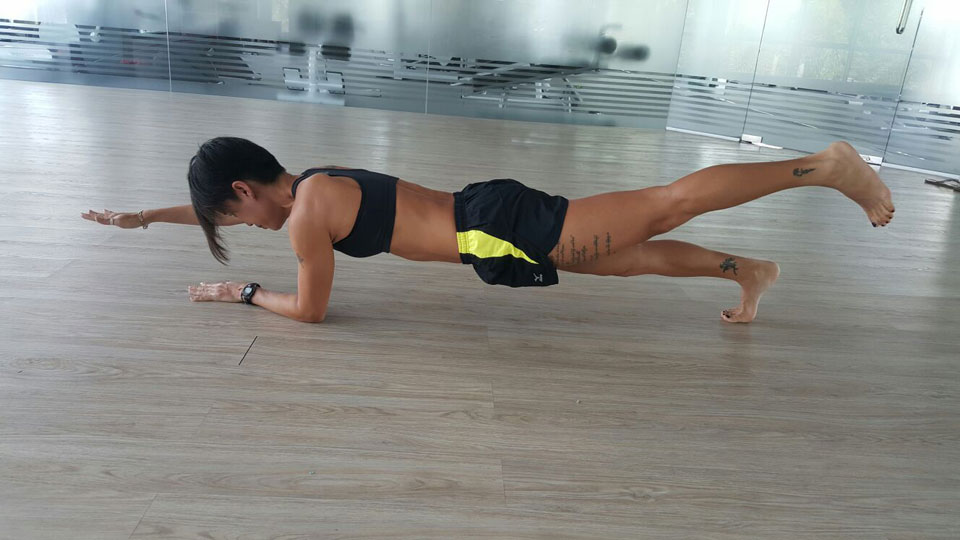
Eileen’s tips: If you find this the easiest of all exercises to master, you’re not wrong, but that doesn’t mean I don’t urge you to get creative once you nail it. For example, if you already possess enough core strength to brag about it on occasion, enhance your planks by lifting one leg, one arm or one of each extremity together while holding your position (see photos #2 and #3). Your body will want to rotate when you do planks, but don’t allow it to do so!
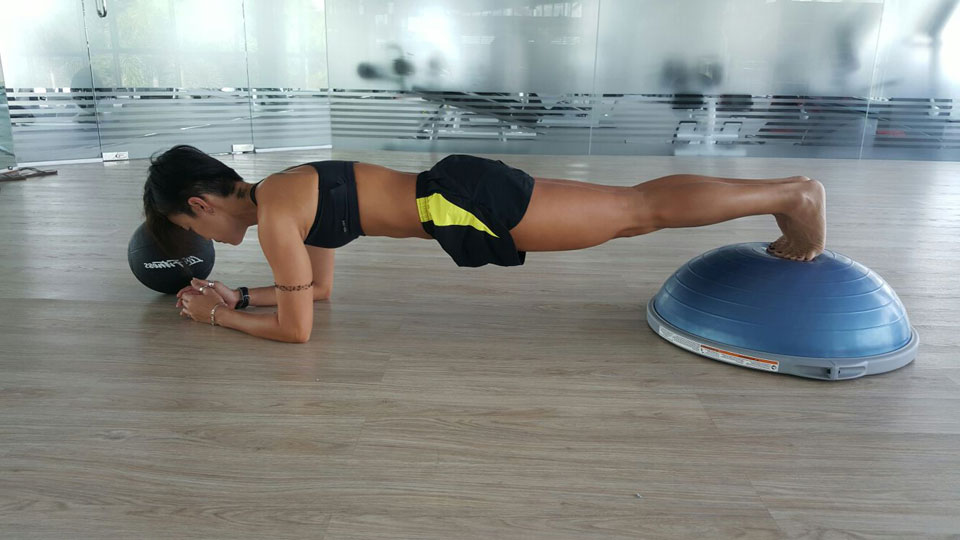
I also recommend doing weighted planks on a Bosu or Swiss Ball. This version has become my plank staple and it could become yours too: Balance your feet on the ball while concentrating your weight on your middle back (see photo #4).
Your core may beg to sag under your own weight, but resist the urge to give in. For added intensity, I do this move with added leg or arm lifts. If you start to shiver and shake while holding this position, congratulations: You have officially graduated from the Eileen Lui School of Fitness and you’re on your way to a healthy future.
Would you like to receive tutorials from Singapore fitness stars in the future? Let us know how you did following Eileen’s comprehensive, 10-week tutorial.


